


An Introduction to the Vertcoin 1-click Miner
Have you ever wanted to mine cryptocurrency but didn’t know where to start?
Typically, you’d have to download a blockchain’s core software, find the right mining client, and locate a mining pool to connect to. After all of this is done, you’d still have some coding hoops to jump through to make sure the miner is synced up with both your chosen pool and a wallet for your mining rewards. Wouldn’t it be great if this process were more accessible?
Introducing the Vertcoin 1-Click miner, a mining program so easy, you won’t have any more excuses not to start. In this guide, we’ll walk you step by step through installation and operation, because while 1-Click miner streamlines the process, everyone needs a helping hand now and again to get started.
Let’s get to it, shall we?
Step 1: Installation
First things first, head over to Vertcoin’s Github to download the 1-Click miner software–it’s the first option under “Assets,” bearing the file name “VertcoinOneClickMinerSetup.msi.”
Once you’ve clicked on that, wait for the download to complete and then click on the setup extension at the bottom of your computer screen.
If you’re using Windows 10, you may get a message saying “Windows protected your PC.” If this happens, just click “More info” at the bottom of the message and then “Run anyway.” Don’t worry–the program is more than safe. Another thing to note: most anti-virus software will treat 1-Click miner as a malicious program. To avoid this, you can either deactivate your anti-virus program during setup or go to its settings and add “Vertcoin One-Click Miner.exe” (or if you change the file name, whatever you chose) to exclusions or trusted programs.

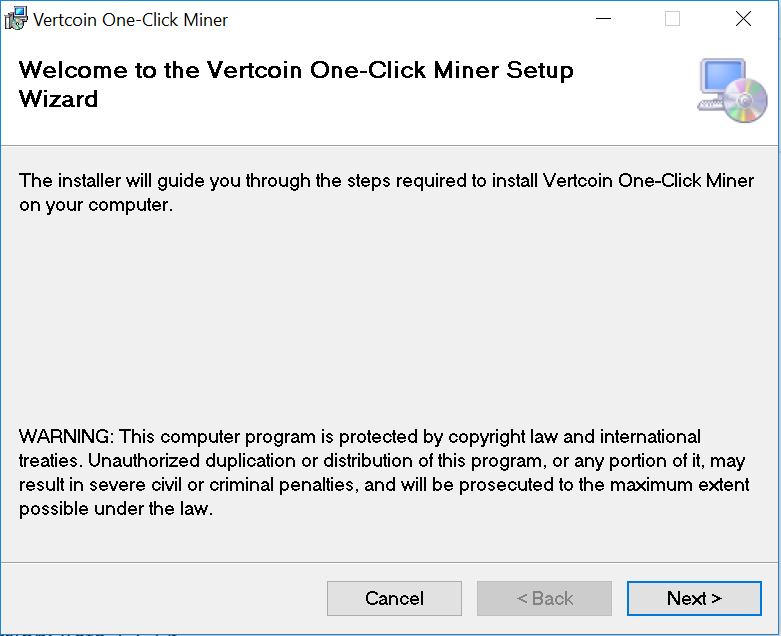
Upon opening up the setup extension, you’ll get the following window.
After clicking next, you’ll get a screen asking you to select a folder for your program. You can either choose to opt for the default folder destination they give you or create your own. It doesn’t make a difference, but just make sure you remember where the program is stored on your PC.

When you’re through with this, click next and you’ll get yet another window that will finalize the installation. Finishing up, you’re computer will redirect you to a screen asking if you want to run the 1-Click miner software. Assuming that you do (otherwise why would you be here), click yes, and there you have it. Step one done.
Step 2: Connecting to a Pool and Linking Wallet Address
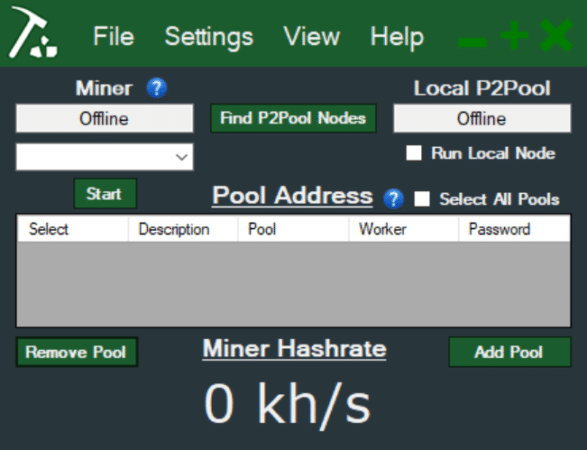
Open the 1-Click miner program and you’ll see the following window. From here, click “Find P2Pool Nodes” to locate a mining pool.
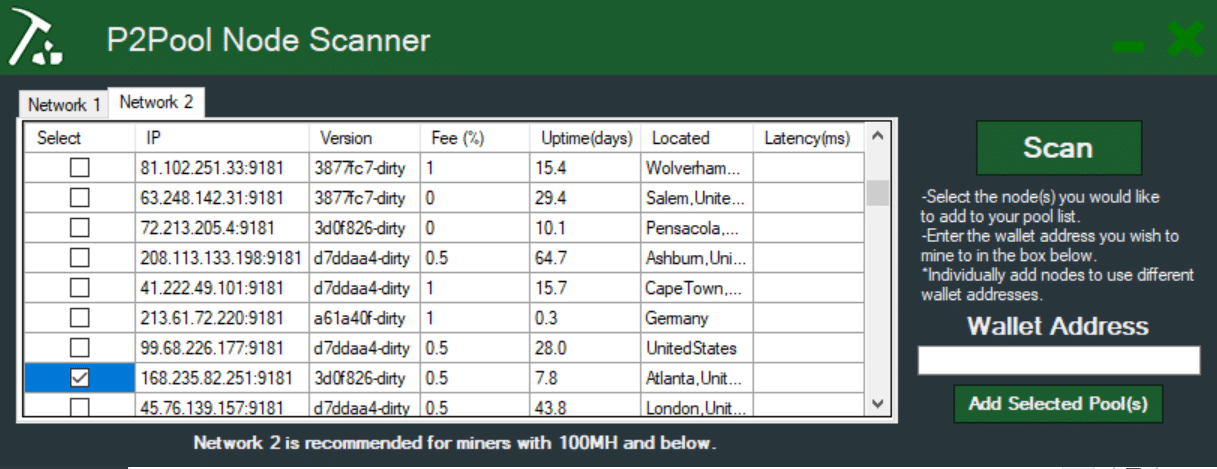
 With the scanner pulled up, click “Scan” and, after a short while, a selection of nodes will refresh onto the page. You’ll then have the option to choose between nodes on “Network 1” and “Network 2.” If you’re using simple hardware, such as your PC’s CPU or GPU, you’ll want to go for Network 2. This network is for equipment that outputs less than 100MH/sec, and unless you have a multi-GPU/CPU mining rig, you’re probably not going to exceed this threshold.
Now, choose one or more nodes to connect to in the second network. Make sure you choose a pool that’s close to you to optimize your mining efforts. Also, make sure you check each pool’s revenue fee. Some can be as low as 0.25%, while others are as high as 5%.
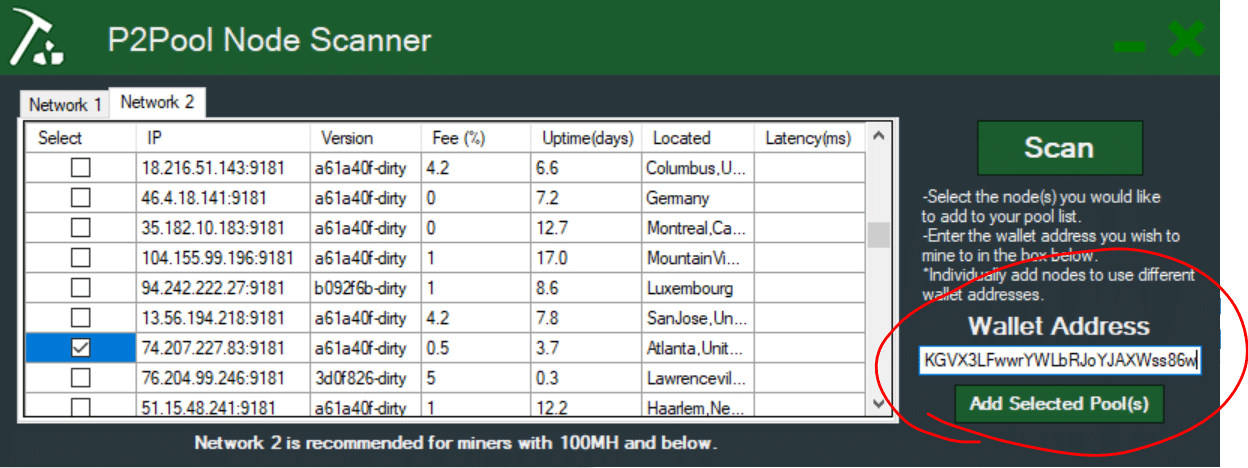
After you’ve chosen your pool(s), it’s time to input your wallet address. If you don’t already have a wallet, you can either download Vertcoin’s core wallet from the currency’s website, the Vertcoin Electrum wallet, or its Coinomi mobile wallet. Don’t have a wallet on the computer you’re using to mine? No sweat–you can choose to send your mining revenue to wallet on another device entirely.
Once you’ve input your wallet address, click “Add Selected Pool(s)”
Step 3: Get That Sucker Runnin’
Now that you’ve got your pool selection and wallet address sorted out, it’s time to start mining.
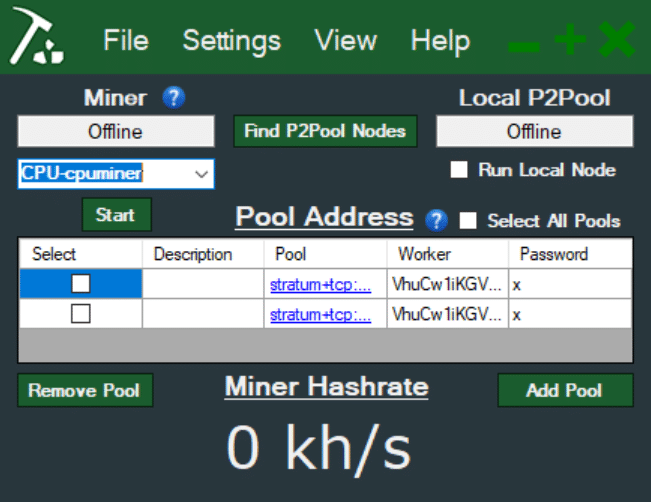
Your 1-Click miner homepage should look something like this:
From here, you’ll want to select your mining hardware from the drop-down in the left-hand corner. You can use either your processor or select your PC’s processor (CPU) or its graphics card (GPU). If you’re using a GPU, make sure you know which one your computer specifically uses.
Next, you’ll select which pool you want to connect to. You can select multiple pools at a time, but the miner will always prioritize the first choice in your queue. Using multiple pools does not mean you’ll be contributing hashing power to both at once; it simply means that, if your first pool were to go down for whatever reason, the second pool would come in to take its place.

Finally, click start and you’re off to the races. You may get a pop-up from 1-Click miner for an update if it’s available. Just download the update and it’ll clear in no time.
Once the miner starts, it’ll either be listed as “Online” or “Waiting for share” in the top right corner. Either way, rest assured that the miner is working as it should. If you don’t see your Miner Hashrate” raise at the bottom of the screen immediately, don’t be alarmed. Often times, low hashing power hardware won’t register much of a hash rate until the program has been running for awhile if at all.
And there you have it, folks–you can now contribute to the decentralized monetary revolution. Just like I said in my Vertcoin beginner’s guide, so easy your great aunt Sally could do it.


