Just as with receiving ERC20 tokens, sending them using a Ledger is a little more complicated than sending Bitcoin or Ethereum. To send these tokens, you’ll have to use MyEtherWallet. Thankfully, the first few steps are identical to what you did when receiving the tokens. In this article, we’ll show you how to send ERC20 tokens from a Ledger Nano S to another address.
If you haven’t configured your Ledger yet, take a look at our Setup Guide.
How to Send ERC20 Tokens From a Ledger Nano S
Step 0. The classic first step – connect your Ledger to a computer and put in your pin code.
Step 1. On your Ledger Nano S, open the Ethereum app. If missing from your Ledger, download the app from the Ledger Manager.
Step 2. Also on the Ledger, Navigate to Settings -> Browser Support, and set it to “Yes”.
Step 3. From a web browser, visit MyEtherWallet. You should manually type out the URL each time you visit to avoid phishing scams.
Step 4. Click “Send Ether & Tokens” at the top of the page.
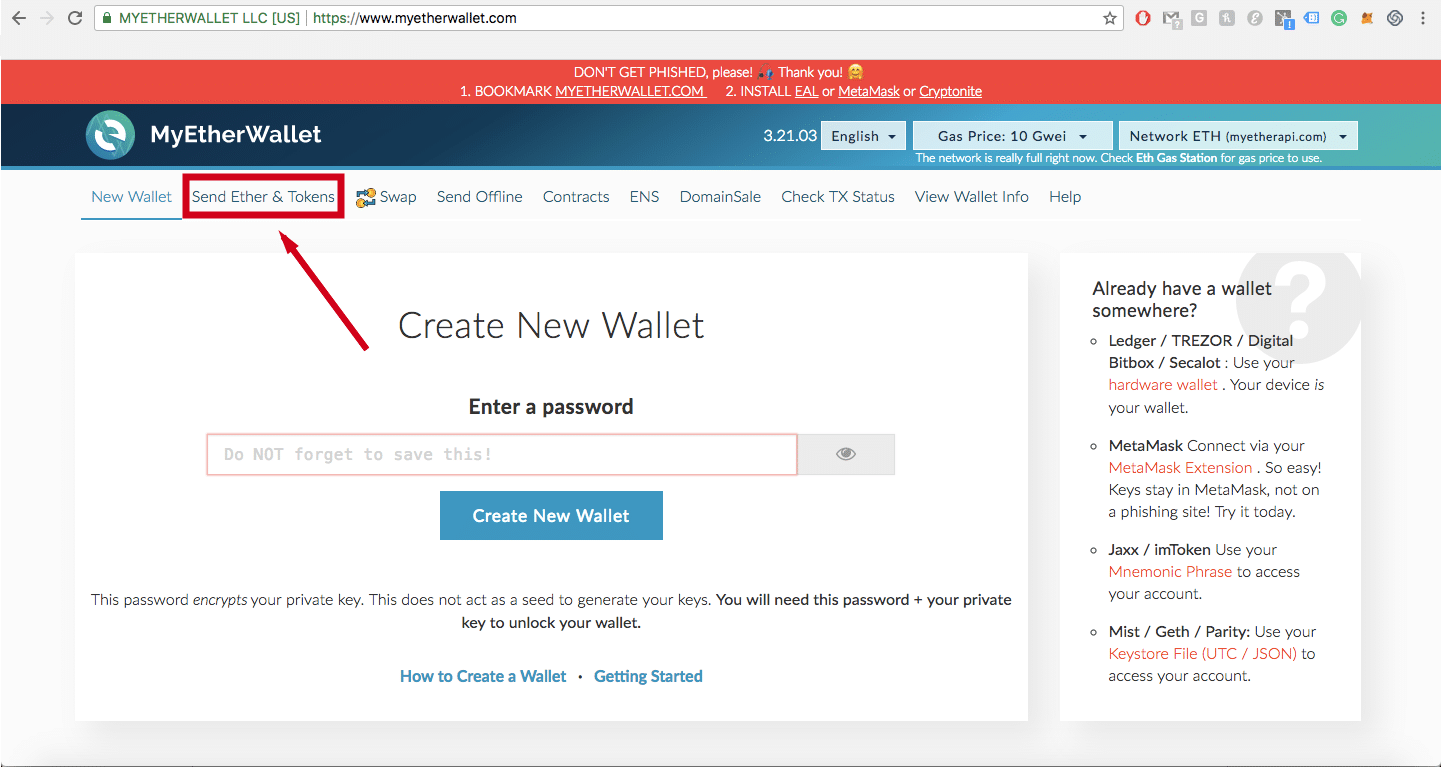
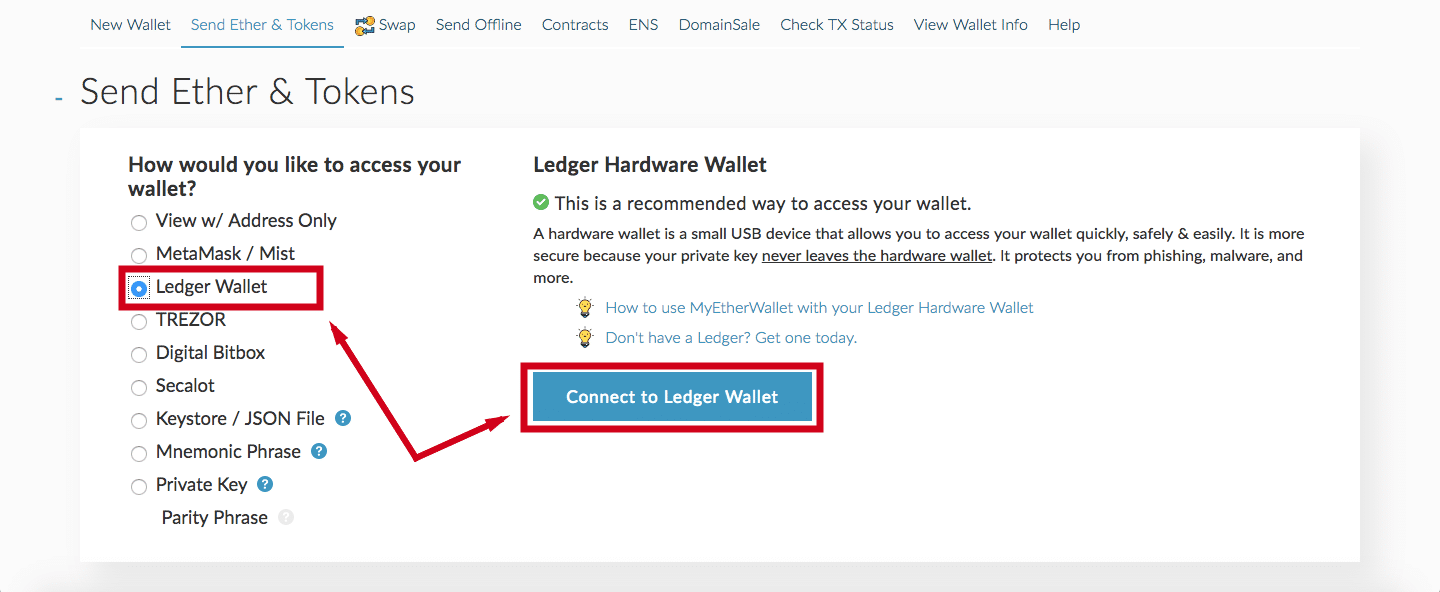
Step 5. Select “Ledger Wallet”, and click “Connect to Ledger Wallet.”
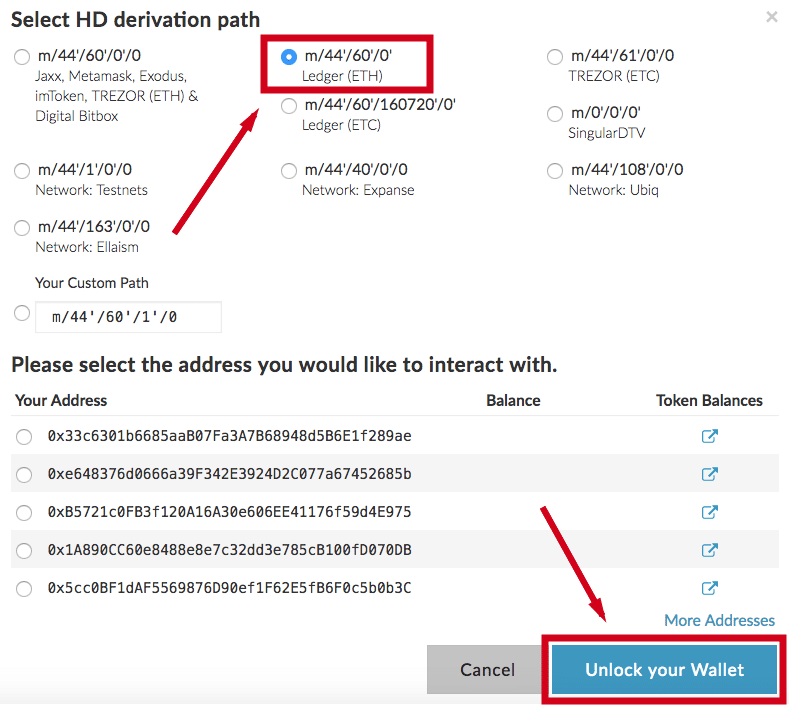
Step 6. Next, a pop-up will appear with HD derivation path options and addresses. For the HD derivation path, choose “Ledger (ETH).” Select whichever address contains the coins you want to send.
Step 7. Click “Unlock Your Wallet.”
This is where it differs from receiving
Step 8. On the next page, enter the recipient’s address and the amount you wish to send.
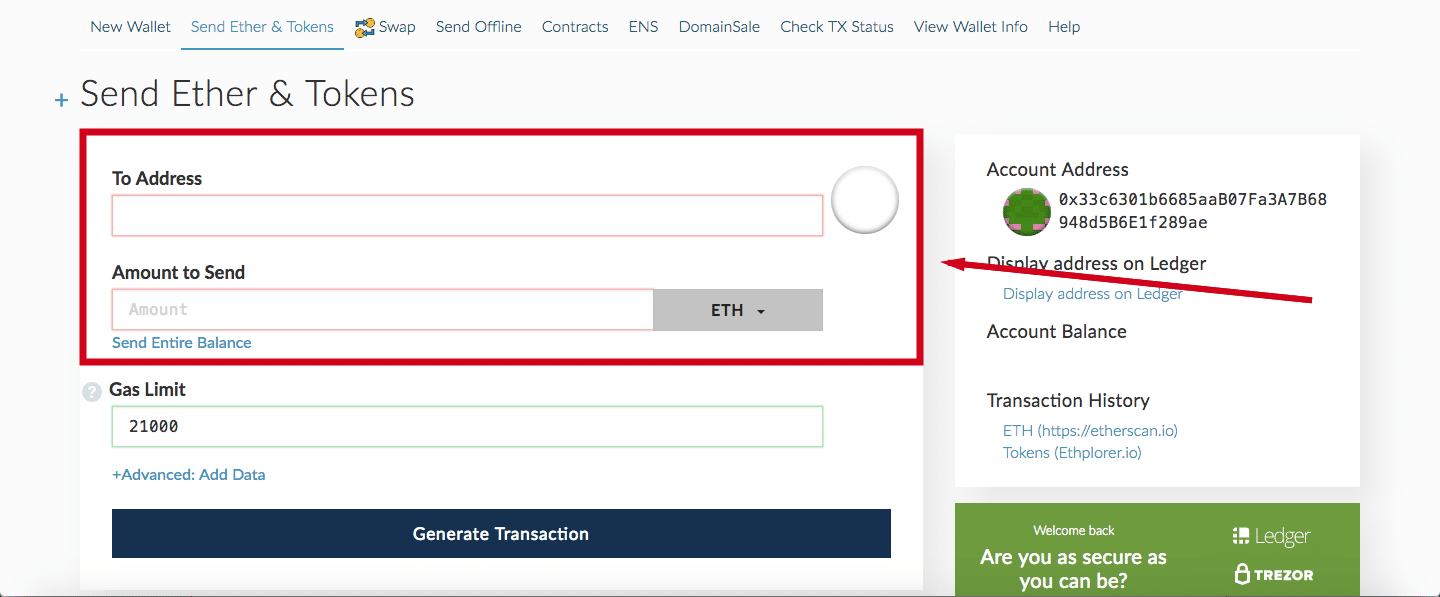
Step 9. Select which token you want to send from the drop-down. If you don’t see your token there, you have a couple of additional steps (9.1-9.4).
Step 9.1. Scroll down to the “Token Balances” section on the right side.
Step 9.2. Click “Show All Tokens”.
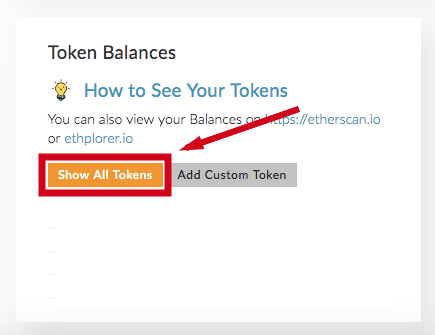
Step 9.3. Find the token you want to send and “Click to Load” it.
Step 9.4. You should now be able to see the token balance directly in MyEtherWallet, and it should be an option in the send drop-down.
Step 10. Set the Gas Limit for your transaction. MyEtherWallet defaults this differently for each transaction. We recommend using the default – it’s highly unlikely that the transaction will use the entire amount.
*NOTE: You must pay the gas fee in Ethereum. If you don’t have enough Ethereum in your wallet to cover this amount, your transaction will not go through.
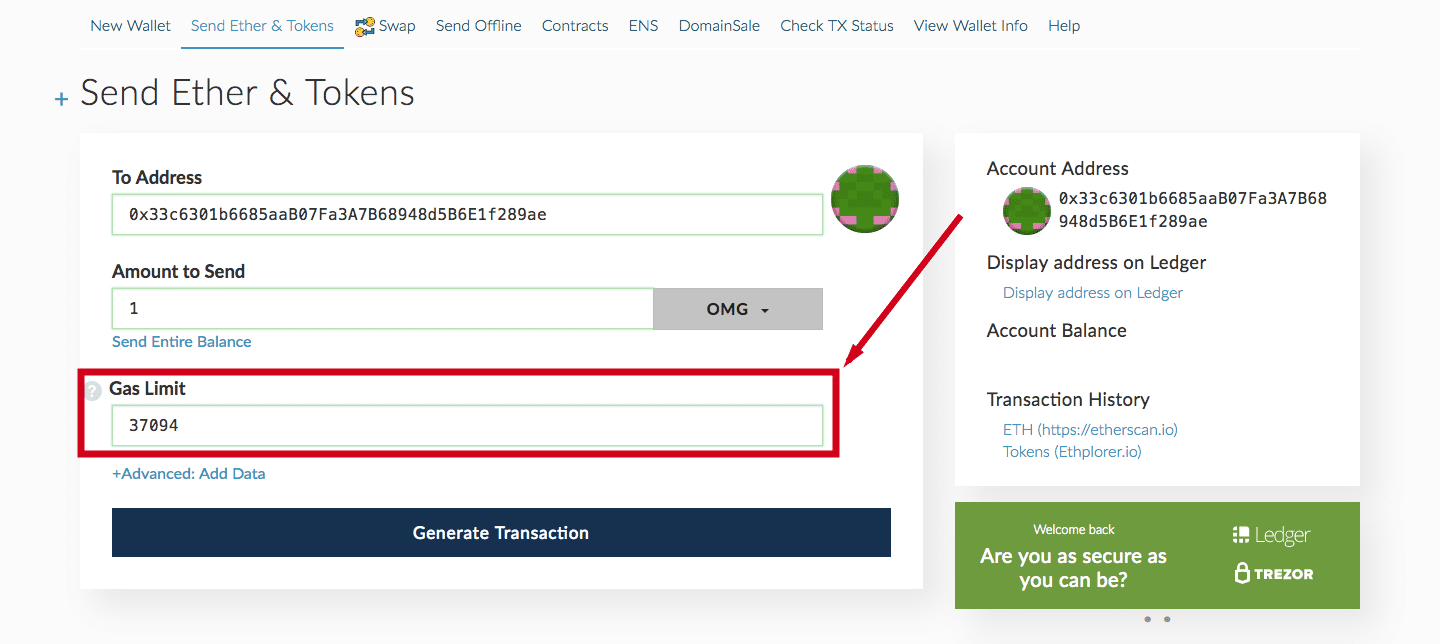
Step 11. If you haven’t already, go to Settings -> Contract data on your Ledger Nano S and set it to “Yes.” This allows you to transact ERC20 tokens in addition to Ethereum.
Step 12. Click “Generate Transaction.” Your Ledger will ask you to confirm the amount and the recipient address as well as the fees.
Step 13. If everything looks okay, confirm using your Ledger.
Step 14. MyEtherWallet will then show you Raw Transaction and Signed Transaction data. Your recipient’s address is in the Signed Transaction data.
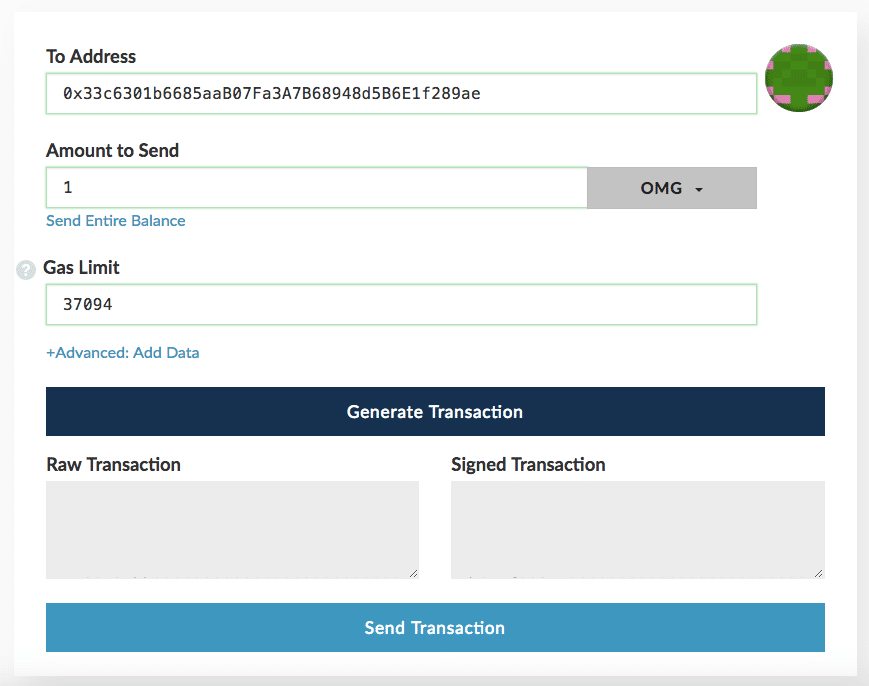
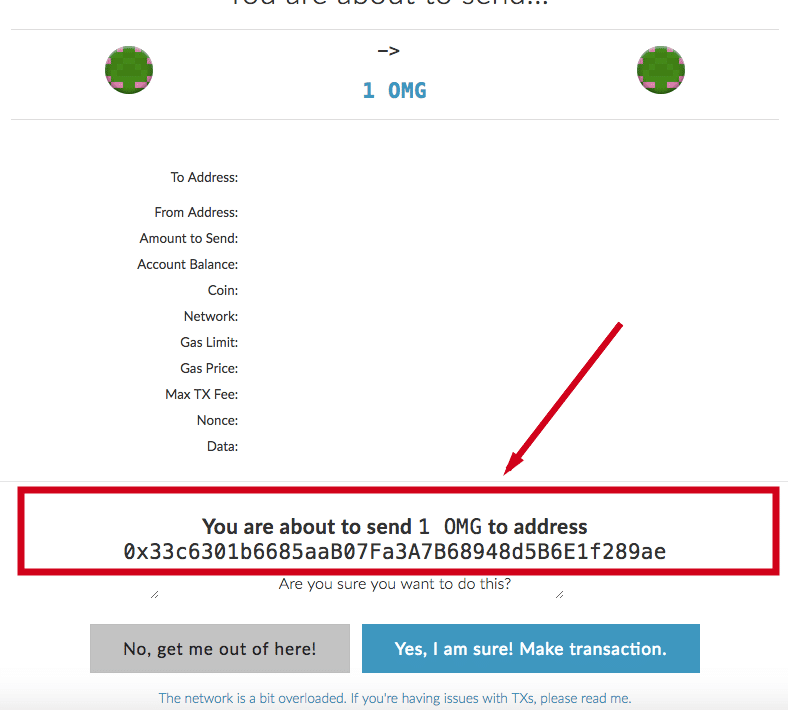
Step 15. Click “Send Transaction” and a pop-up will appear with the details.
Step 16. Check to make sure the details at the bottom of the pop-up are correct. If they are, confirm the transaction.
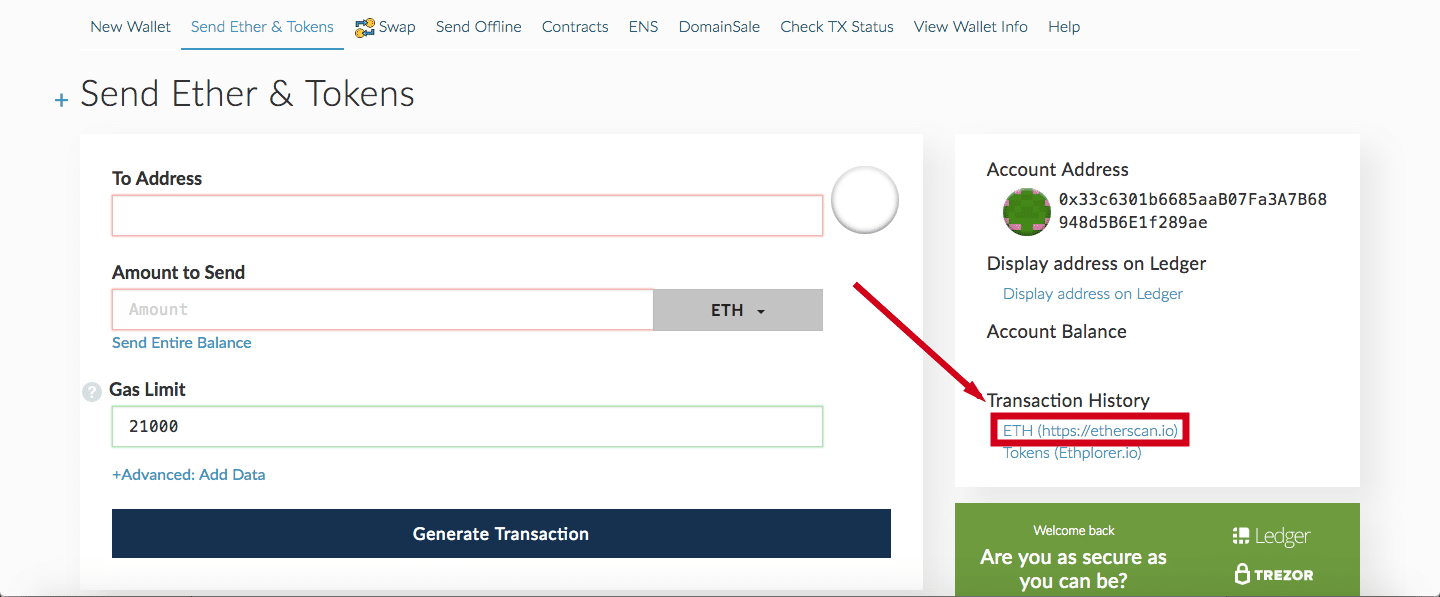
Step 17. Click on the Etherscan link at the right side of the page to check the status of your transaction.
Additional Ledger Nano S Guides
That covers everything you need to know when sending ERC20 tokens from your Ledger Nano S to another address. Take a look at the guides below with any other Ledger Nano S questions:
How to Send Bitcoin From a Ledger Nano S
How to Send Ethereum From a Ledger Nano S
How to Transfer Bitcoin to a Ledger Nano S
How to Transfer Ethereum to a Ledger Nano S
How to Transfer ERC20 Tokens to a Ledger Nano S (Using MyEtherWallet)
[thrive_leads id=’5219′]


